Prepping a quilt for longarm quilting
Separate the Layers
Each layer of the quilt (top, batting and backing) is mounted on its own roller; so, leave them as three separate pieces.
Backing
Square the backing with the selvage edge. Whether the back is a single, wide-width piece or composed of several different pieces, it should be square. Selvage edges don’t have the same drape or fold as the rest of the material so remove them from the material prior to piecing.
When piecing backing, square each individual piece of fabric before sewing them together. Then press the seams either open or to the side. I personally prefer to one side, but I leave that up to you. Double check that the backing is still square. The backing should be treated as if piecing a giant block. Make sure the backing is at least 4” larger than the quilt top. If it is larger than that, there’s no need to trim it down. Just leave it.
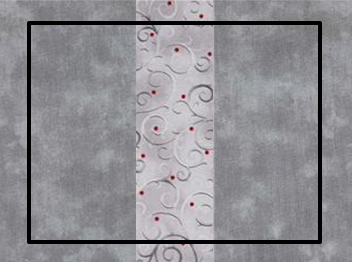
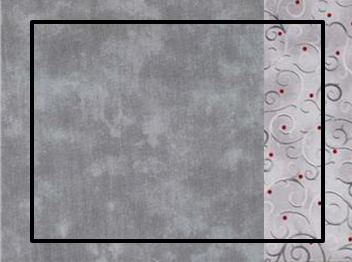
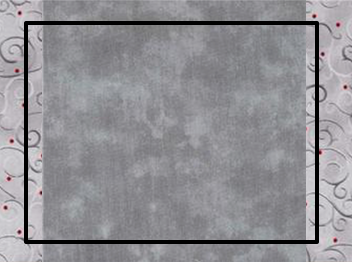
Consider where the quilt top will actually be positioned on the backing when the quilt is complete. If two pieces are added to either side of the back, how much will actually be used on the back? It could result in what appears to be two tiny borders on each side of the quilt—any unevenness would be stand out more. One larger single piece on one side might look better. My preference is to cut the backing and add a strip in the center.
Piecing and Cutting
Be as accurate as possible when cutting the fabric and constructing the block. Small errors will add up quickly when there are a lot of seams. For example, on a block that has just eight seams and if either the cutting or piecing is off by just 1/16”, that block is off by 1/2”. Over two blocks, that’s a whole inch!
Press each seam after it is stitched before moving on to adding another piece. In general, the seams should be pressed towards the darker fabric so that the seam itself doesn’t show a shadow under the lighter material.
Quilting options change based on whether the seams are pressed open or to the side.
If you want to highlight the piecing then “stitch in the ditch” style quilting will do that. The seams are pressed to one side to create a high side (which contains the seam allowance) and a low side (the side without the seam allowance). Stitching in the ditch means to stitch on the lower side as close to the higher side as possible.
If there is a lot of bulk in the piecing, you may want to press the seams open. With open seams “stitch in the ditch” isn’t possible as there is no fabric on the quilt top to stitch. The quilting would only bind together the batting and backing. Stitching along an open seam can also damage or even cut the thread as the needle passes over the seam which can cause the piecing to come undone.
Final Pressing
Make sure the top is pressed well. Seams should be neatly pressed whether to one side or open. This is especially important on the borders. If the seam flips from one side of the border to the other, the finished border will appear to waiver from side to side.
Clip threads
Trim dark threads whether from dark fabric or from the piecing thread behind light colored fabric. Loose threads can show through with light colored fabric creating a spider vein effect. My general rule of thumb is to match my piecing thread to the lightest color of fabric that I’ll be using in the top. That doesn’t keep dark fabric from fraying into the light, but I don’t have to worry about stray threads from piecing.
Shrinkage
Always plan for your quilt top to be bigger than it actually needs to be. All quilt tops shrink when they are quilted because curves are being added to the quilt top which makes them smaller than the original measurement. Imagine a quilt top laying flat on the floor. If several rolled up socks are placed under the top (adding curve), the edge to edge measurement of the quilt top becomes smaller. The more quilting (the more curves added), the smaller the quilt will be.
There is no hard and fast rule on how to determine shrinkage. The amount of shrinkage is affected by the amount of quilting and the type and thickness of the batting. Cotton, wool, bamboo and other natural products will shrink the first time it is washed. The amount of shrinkage is printed on the product packaging. For example, Hobbs 80/20 (80% cotton/20% polyester) will shrink between 3-5%. On a 100” wide quilt, shrinkage is between 3-5 inches. Polyester batting doesn’t shrink when washed, but still causes shrinkage of the quilt top due to loft and thickness. The thicker the polyester, the larger the curve that is added and the more shrinkage.